First, our computers need to install Monitor Callibration, to callibrate the colours and able to make it same colour tones with the print out photos compare with the one in monitors.
So, its important. Today I just want to share how to edit and change the colours to the quality you want and have to be aware of too big colours edit/contrast will cause image noise.
What's image noise?>>
http://en.wikipedia.org/wiki/Image_noiseAnyway, today I just show how to edit a JPEG file format image. I just wanna share the basics since I'm still a learner, not professional.

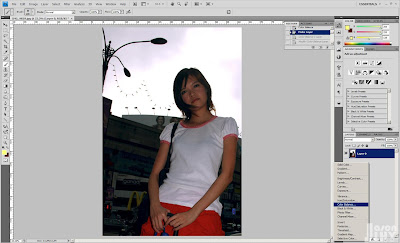
Okay, first I opened an image of my sister with Adobe Photoshop CS4, then I go to Image> Adjustment> Curve.
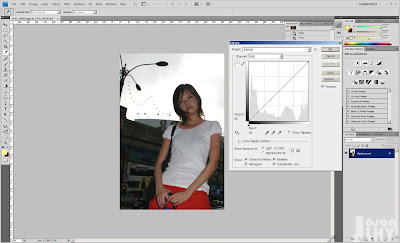
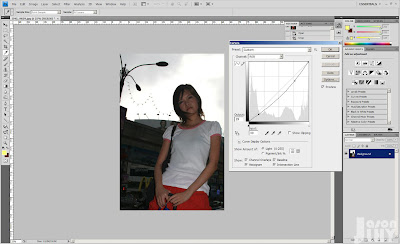
A graph will be popped out and shown. Try to adjust the line on the graph to change the brightness, you can have more points added on the line to edit more detailed on the image quality that you wanna correct. To me, I usually will add one or two points on the line to adjust.
You also can try click "Auto" as they will auto correct for you, but might not get the adjustment you looking for. Same to the "Auto Contrast/Auto Tone/ Auto Colour" which can be found in "Image" on the top bar.
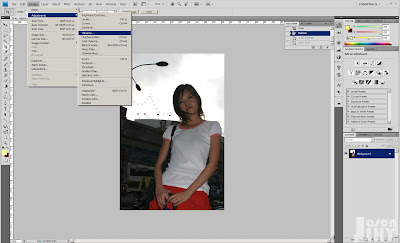
Then, here's a thing that sometimes I will do, go to Image> Adjustment> Vibrance.

Vibrance is a tool, to make your photo increase the contrast/saturation or vibrancy of your photo, make it more colourful in other words. But I usually won't increase too high vibrancy and too saturated, I usually keep is below or equal to 20 for Vibrancy, 10 more or less for Saturation.

Then, here's the nice part that I like. Edit the colours to adjust the colour mood of the image.
Goto Image>Adjustment> Colour Balance.
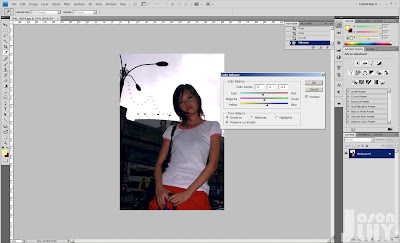
try to play around with it, u can adjust the color balance either on Midtones, Shadow, or Highlights (Tone Balance)
Then, this is something I seldom do, but I will share with you since I learnt it from someone. go to where I shown you in this image above, to create a new backup layer a.k.a. mask layer to adjust colours.
Okay, because I want the background to have more saturated colours but I don't want to affect the talent( model for photography called talent)'s skin colour, I don't her skin look very reddish or too vibrant. so I create a mask layer to edit the color balance.
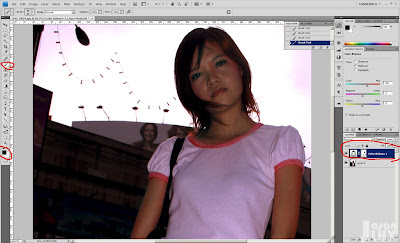
So, here's the thing. after I edited that, then I used Brush Tool and chose black colour and start, colouring it on the part where you want to erase the mask layer.
Now, the brush with black colour works like erase at here.Thus, I erase her skin part where I wan to maintain back her skin colour less vibrant and saturated, so on the layer below the mask layer will be shown to the front once I erased the mask layer with Brush tool with Black Colour.
Sorry if I confused you with my explanation. Try experiment with it, then u will know what I mean =).
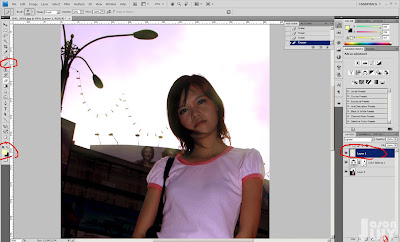
Then, this is something extra that I will do sometimes, not often. Which is adding some extra effects with Brush tool on a new layer. Normally I don't add these because it's better to keep it original and natural.
So, I added this light effect, not too heavy on this, I added some glow with blurry Brush type as the light shone from behind, some lights should be added around her lightly.
The Brush I change its mode to "Screen" and opacity changed to around 20% - 30% and the layer's mode is "Lighten" I painted with brush on .
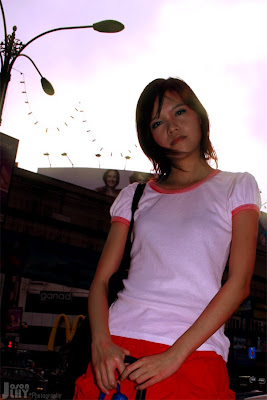
so the end result is like this =), hope it helps a lot =)

 This photo was taken through a window. I like this method because you can get the window reflection effect on it and gives a little dreamy kind of feel to me. Then, colour mood was adjusted with photoshop, "Colour Balance" and also "Curve"
 try to play with the focus point manually and train the speed, so won't fail to capture some moments. To me, I learn from trial and errors. To get the nice shots of animals, sometimes I tried use continuos shots mode to snap, have higher chances of getting right photo.


